412016357 [main] bash 4460 exception::handle: Exception: STATUS_ACCESS_VIOLATION 412017215 [main] bash 4460 open_stackdumpfile: Dumping stack trace to bash.exe.stackdump
Today, I received the above core dump when I tried to load cygwin or mintty. A simple
solution worked for me.. In task manager I noticed many bash.exe processes opened. Killing
all those processes (or loading a command line window and typing in killall /im bash.exe /f)
worked for me.
Friday, April 1, 2011
Monday, March 21, 2011
Eclipse PDT - auto deploy webapp to htdocs (webroot)
I've been using EclipsePDT (Eclipse PHP Development Tools project) for quite a bit now. One thing that this Eclipse distribution lacks is an 'auto deploy' feature which will automatically copy your web app to your http servers webroot (htdocs folder). Most people will suggest to make your Eclipse workspace reside in the webroot folder to combat this. I hate this idea so I utilized ANT to auto copy my web files to my web root everytime I saved.
This technique utilizes the addition of a custom builder to your web project. First, create a file 'build.properties' in the root of your eclipse project.
In your build.properties file place the following lines...
apache.htdocs.dir=C:/Program Files (x86)/Zend/Apache2/htdocs
web.root.dir=my_webproject
full.deploy.path=${apache.htdocs.dir}/${web.root.dir}
Replace the apache.htdocs.dir to your webroot folder. Next change web.root.dir to your web project name (as it reflects in eclipse).
Now, create a file build.xml and place this in the root of your eclipse project. Paste the following into this file
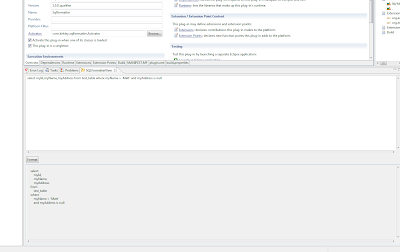
Next, you need to tell eclipse that you have a custom builder that you want to run every time you save a file in your project. To do this, right click your project and goto "Properties". In the properties wizard, click on 'Builders'. Click the 'New...' button to create a new builder. Select the option 'Ant Builder'. A configuration wizard will now appear. The buildfile field, click the button 'Browse Workspace...' and select the build.xml file we created.
That completes the task. Edit a file in your project and save it. You will notice some ant output in your console showing the copy that is done to copy your webapp to your webroot.
Take screenshots of Websites
A couple days ago I created a utility that will take a screenshot of a website you specify. I am not sure how much further I am going to go with it, but I have found some uses for it... You can find the utility below..
http://ventralnet.no-ip.org/matt/weboshot
http://ventralnet.no-ip.org/matt/weboshot
Thursday, November 4, 2010
SQL Beautifier Eclipse Plugin
I created an eclipse plugin that will give you the ability to beautify SQL statements (give some formatting to the SQL to make it easier on the eye).
To install. Download the http://userpages.umbc.edu/~kirkley1/sqlformatter_1.0.0.201011042037.jar jar file and copy it into your 'plugins' folder of your eclipse install.
After copying, load up eclipse. You can find the sql formatter view if you goto Window|Show View then expand the SQL Formatter category folder and select "SQLFormatterView". Paste the unformatted SQL statement in the top text box and hit the 'Format' button. The 'pretty' sql should display in the bottom text box.
Enjoy!

Wednesday, August 18, 2010
Java Tid-bits
Wrapper classes and the == and != operator
Take the following code example:
Integer a = 130;
Integer b = 130;
if (a == b) {
    System.out.println("a == b");
}
Integer c = 100;
Integer d = 100;
if (c == d) {
    System.out.println("c == d");
}

Integer e = new Integer(100);
Integer f = new Integer(100);
if (e == f) {
    System.out.println("e == f");
}
What is output by the following code fragment? The answer is...
c == d
If the equals-equals operator evaluated to true for c==d why did it not for a==b? And furthermore, if c == d then why does e ==f evaluate to false?
This shows an interesting aspect of auto-boxing and the way Java manages/saves memory. The golden rule is that for the types Boolean, Byte, Character (\u0000 to \u007f), Short, and Integer (-128-127), if a variable is created by auto-boxing an evaluation of the == operator will return true for equal value items.
Your next question may be... "Well why is e == f evaluating to false?" This is because when we explicitly call the Integer constructor, passing it 100 we are bypassing the auto-box feature of java and therefore the rule doesn't apply.
PS: You should never rely on == for wrapped objects. Always use the .equals method!
Java Tid-bits
Method Overriding and Autoboxing
Java is full of little nuances. One interesting is the handling of overridden methods and the auto-boxing feature that was introduced in Java 1.5. For example suppose you had a class with the following methods..
public void doStuff(long myParam) {
    System.out.println("long");
}

public void doStuff(Integer myParam) {
    System.out.println("Integer");
}
Now take the following code block
int myInt = 4;
doStuff(myInt);
doStuff(3);
What would be output? The answer is...
long
long
Why is this? Well one might thing that Java will take myInt and automatically box it to be an Integer then call the method that accepts an Integer parameter. This is not the case. When autoboxing was introduced in Java 1.5 the designers wanted to make absolutely sure that legacy code (previous to Java 1.5) would still work as it always has. To guarantee this they had to make implicit casting favored over auto-boxing when overriding methods.
Monday, June 21, 2010
Creating a java keystore using VeriSign as a certificate authority
Here is a step by step run through of creating a java ssl keystore using VeriSign as your certificate authority. I recently ran through this with a client so I figured I'd share since this has little to no correct documentation.
PREREQUISITE: You will need a jdk installed for you operating system. Also, I assume that you have added the $JAVA_HOME/bin folder to your $PATH environment variable. If you have not done so, you will need to run the commands I give from within the $JAVA_HOME/bin directory. You should see an executable named keytool.exe in this folder that is used throughout this tutorial.
First things first, we need to create a keystore, which in turn will create you private encryption key that will be used in the authentication process with clients. I like to think of a keystore as somewhat of a secure zip file. A keystore can contain many certificates which are distinguished by unique name identifiers (just like a java.util.HashMap in the Java world). The following command will create a 2048 bit RSA private key which is pretty standard today.
keytool -genkey -keyalg RSA -keysize 2048 –keystore –alias my_cert my-keystore.keystore
Next, keytool will ask you for a password for your newly created keystore. Specify whatever password you like. Along with your password, you will be asked a series of questions.
NOTE: For the "What is your first and last name?" question, enter the full domain name. When I say full domain name, I mean whatever a user will type into the address bar in their browser when they go to your site. For example, if we were creating this keystore for google.com. You would specify www.google.com for this question.
At this point you now have a keystore named my-keystore.keystore. The next step is to create what is known as a certificate signing request. This request is what VeriSign will ask for to generate your public key (signing your certificate). The following command will generate your CSR
keytool –certreq –keyalg RSA –alias my_cert –file certreq.csr –keystore my-keystore.keystore
NOTE: It is important to use the same –alias and –keystore as used in command 1)
Now send your CSR to verisign per their instructions (they will send you instructions after you purchase your certificate). Verisign will then respond with your certificate. We will need to import the certificate they generate for you as well as the Intermediate Certificate from verisign.
At the time of authoring this guide the intermediate CA can be found here http://www.verisign.com/support/verisign-intermediate-ca/secure-site-intermediate/index.html . Copy the encrypted text to a file named intermediate.cer (make sure you do not add extra spaces) Next import intermediate.cer into your keystore
keytool –import –trustcacerts –alias intermediatechain –file intermediate.cer –keystore my_keystore.keystore
Next we want to import the certificate supplied from Verisign (what you bought). This is your public key. I assume for the below command that you saved your certificate in a file named server.cer.
keytool –import trustcacerts –alias my_cert –keystore my_keystore.keystore –file server.cer
NOTE: You must give this the same alias as used for your private key in command 1). Namely, this is ‘my_cert’ in this example.
At this point your keystore is properly configured and now you must configuration JBOSS to use it. Copy my_keystore.keystore to JBOSS_HOME\server\default\conf .
Next open the file JBOSS_HOME\server\default\deploy\jbossweb.sar\server.xml .
You should see some lines that look like below... You may need to uncomment these lines in the xml file if they are commented out.
Change the keystorePass to be whatever you password you gave your keystore when we created it in command 1)
Congratulations, you have configured your VeriSign purchased certificate to work with JBoss.
Subscribe to:
Posts (Atom)